IO
IO基础知识总结
IO流简介
IO即Input/Output,输入和输出。数据输入到计算机内存的过程即输入,反之输出到外部存储(比如数据库,文件,远程主机)的过程即输出。数据传输过程类似于水流,因此称为IO流。IO流在Java中分为输入流和输出流,而根据数据的处理方式又分为字节流和字符流。
Java IO流的40多个类都是从如下4个抽象类基类中派生出来的。
- InputStream/Reader:所有的输入流的基类,前者是字节输入流,后者是字符输入流。
- OutputStream/Writer:所有输出流的基类,前者是字节输出流,后者是字符输出流。
字节流
InputStream(字节输入流)
InputStream用于从源头(通常是文件)读取数据(字节信息)到内存中,java.io.InputStream抽象类是所有字节输入流的父类。InputStream常用方法:
// 返回输入流中下一个字节的数据。返回的值介于0到255之间。如果未读取任何字节,则代码返回-1,表示文件结束。
read()
// 从输入流中读取一些字节存储到数组b中。如果数组b的长度为零,则不读取。如果没有可用字节读取,返回-1。如果有可用字节读取,则最多读取的字节数最多等于b.length,返回读取的字节数。这个方法等价于read(b,0,b.length)。
read(byte b[])
// 在read(byte b[])方法的基础上增加了off参数(偏移量)和len参数(要读取的最大字节数)
read(byte b[], int off,int len)
// 忽略输入流中的n个字节,返回实际忽略的字节数。
skip(long n)
// 返回输入流中可以读取的字节数。
available()
// 关闭输入流释放相关的系统资源。
close()

// 从Java9开始,InputStream新增加了多个实用的方法:
// 读取输入流中的所有字节,返回字节数组。
readAllBytes()
// 阻塞直到读取len个字节。
readNBytes(byte[]b,intoff,intlen)
// 将所有字节从一个输入流传递到一个输出流。
transferTo(OutputStreamout)FileInputStream是一个比较常用的字节输入流对象,可直接指定文件路径,可以直接读取单字节数据,也可以读取至字节数组中。
FileInputStream代码示例:
try (InputStream fis = new FileInputStream("input.txt")) {
    System.out.println("Number of remaining bytes:"
            + fis.available());
    int content;
    long skip = fis.skip(2);
    System.out.println("The actual number of bytes skipped:" + skip);
    System.out.print("The content read from file:");
    while ((content = fis.read()) != -1) {
        System.out.print((char) content);
    }
} catch (IOException e) {
    e.printStackTrace();
}
input.txt文件内容:
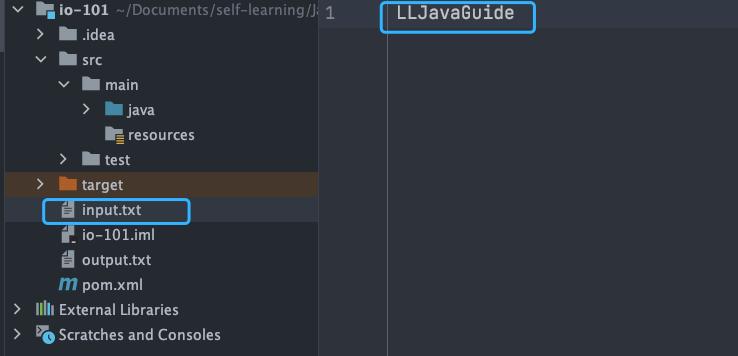
输出:
Number of remaining bytes:11
The actual number of bytes skipped:2
The content read from file:JavaGuide
不过,一般我们是不会直接单独使用FileInputStream,通常会配合BufferedInputStream(字节缓冲输入流,后文会讲到)来使用。像下面这段代码在我们的项目中就比较常见,我们通过readAllBytes()读取输入流所有字节并将其直接赋值给一个String对象。
// 新建一个BufferedInputStream对象
BufferedInputStream bufferedInputStream = new BufferedInputStream(new FileInputStream("input.txt"));
// 读取文件的内容并复制到String对象中
String result = new String(bufferedInputStream.readAllBytes());
System.out.println(result);DataInputStream用于读取指定类型数据,不能单独使用,必须结合FileInputStream。
FileInputStream fileInputStream = new FileInputStream("input.txt");
//必须将fileInputStream作为构造参数才能使用
DataInputStream dataInputStream = new DataInputStream(fileInputStream);
//可以读取任意具体的类型数据
dataInputStream.readBoolean();
dataInputStream.readInt();
dataInputStream.readUTF();ObjectInputStream用于从输入流中读取Java对象(反序列化),ObjectOutputStream用于将对象写入到输出流(序列化)。
ObjectInputStream input = new ObjectInputStream(new FileInputStream("object.data"));
MyClass object = (MyClass) input.readObject();
input.close();
另外,用于序列化和反序列化的类必须实现Serializable接口,对象中如果有属性不想被序列化,使用transient修饰。
OutputStream(字节输出流)
OutputStream用于将数据(字节信息)写入到目的地(通常是文件),java.io.OutputStream抽象类是所有字节输出流的父类。OutputStream常用方法:
// 将特定字节写入输出流。
write(int b)
// 将数组b写入到输出流,等价于write(b, 0, b.length)。
write(byte b[ ])
// 在write(byte b[ ])方法的基础上增加了off参数(偏移量)和len参数(要读取的最大字节数)。
write(byte[] b, int off, int len)
// 刷新此输出流并强制写出所有缓冲的输出字节。
flush()
// 关闭输出流释放相关的系统资源。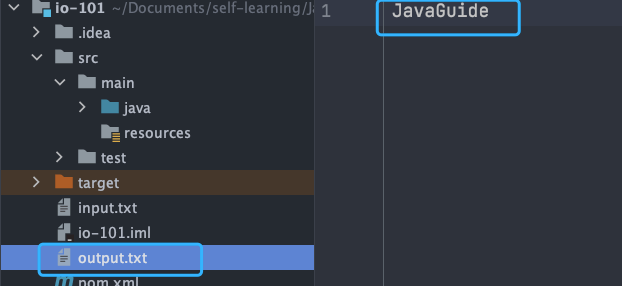
close()FileOutputStream是最常用的字节输出流对象,可直接指定文件路径,可以直接输出单字节数据,也可以输出指定的字节数组。FileOutputStream代码示例:
try (FileOutputStream output = new FileOutputStream("output.txt")) {
    byte[] array = "JavaGuide".getBytes();
    output.write(array);
} catch (IOException e) {
    e.printStackTrace();
}
运行结果:
类似于FileInputStream,FileOutputStream通常也会配合BufferedOutputStream(字节缓冲输出流,后文会讲到)来使用。
FileOutputStream fileOutputStream = new FileOutputStream("output.txt");
BufferedOutputStream bos = new BufferedOutputStream(fileOutputStream)DataOutputStream用于写入指定类型数据,不能单独使用,必须结合FileOutputStream
// 输出流
FileOutputStream fileOutputStream = new FileOutputStream("out.txt");
DataOutputStream dataOutputStream = new DataOutputStream(fileOutputStream);
// 输出任意数据类型
dataOutputStream.writeBoolean(true);
dataOutputStream.writeByte(1);ObjectInputStream用于从输入流中读取Java对象(ObjectInputStream,反序列化),ObjectOutputStream将对象写入到输出流(ObjectOutputStream,序列化)。
ObjectOutputStream output = new ObjectOutputStream(new FileOutputStream("file.txt")
Person person = new Person("Guide哥","JavaGuide作者");
output.writeObject(person);
字符流
不管是文件读写还是网络发送接收,信息的最小存储单元都是字节。那为什么I/O流操作要分为字节流操作和字符流操作呢?个人认为主要有两点原因:
- 字符流是由Java虚拟机将字节转换得到的,这个过程还算是比较耗时。
- 如果我们不知道编码类型就很容易出现乱码问题。
乱码问题这个很容易就可以复现,我们只需要将上面提到的FileInputStream代码示例中的input.txt文件内容改为中文即可,原代码不需要改动。
输出:
Number of remaining bytes:9
The actual number of bytes skipped:2
The content read from file:§å®¶å¥½
可以很明显地看到读取出来的内容已经变成了乱码。因此,I/O流就干脆提供了一个直接操作字符的接口,方便我们平时对字符进行流操作。如果音频文件、图片等媒体文件用字节流比较好,如果涉及到字符的话使用字符流比较好。字符流默认采用的是Unicode编码,我们可以通过构造方法自定义编码。顺便分享一下之前遇到的笔试题:常用字符编码所占字节数?utf8:英文占1字节,中文占3字节,unicode:任何字符都占2个字节,gbk:英文占1字节,中文占2字节。
Reader(字符输入流)
Reader用于从源头(通常是文件)读取数据(字符信息)到内存中,java.io.Reader抽象类是所有字符输入流的父类。
Reader用于读取文本,InputStream用于读取原始字节。Reader常用方法:
// 从输入流读取一个字符。
read()
// 从输入流中读取一些字符,并将它们存储到字符数组cbuf中,等价于read(cbuf, 0, cbuf.length)。
read(char[] cbuf)
// 在read(char[] cbuf)方法的基础上增加了off参数(偏移量)和len参数(要读取的最大字符数)
read(char[] cbuf, int off, int len)
// 忽略输入流中的n个字符,返回实际忽略的字符数。
skip(long n)
// 关闭输入流并释放相关的系统资源。
close()InputStreamReader是字节流转换为字符流的桥梁,其子类FileReader是基于该基础上的封装,可以直接操作字符文件。
// 字节流转换为字符流的桥梁
public class InputStreamReader extends Reader {
}
// 用于读取字符文件
public class FileReader extends InputStreamReader {
}FileReader代码示例:
try (FileReader fileReader = new FileReader("input.txt");) {
    int content;
    long skip = fileReader.skip(3);
    System.out.println("The actual number of bytes skipped:" + skip);
    System.out.print("The content read from file:");
    while ((content = fileReader.read()) != -1) {
        System.out.print((char) content);
    }
} catch (IOException e) {
    e.printStackTrace();
}
input.txt文件内容:
输出:
The actual number of bytes skipped:3
The content read from file:我是Guide。
Writer(字符输出流)
Writer用于将数据(字符信息)写入到目的地(通常是文件),java.io.Writer抽象类是所有字符输出流的父类。Writer常用方法:
// 写入单个字符。
write(int c)
// 写入字符数组cbuf,等价于write(cbuf, 0, cbuf.length)。
write(char[] cbuf)
// 在write(char[] cbuf)方法的基础上增加了off参数(偏移量)和len参数(要读取的最大字符数)。
write(char[] cbuf, int off, int len)
// 写入字符串,等价于write(str, 0, str.length())。
write(String str)
// 在write(String str)方法的基础上增加了off参数(偏移量)和len参数(要读取的最大字符数)。
write(String str, int off, int len)
// 将指定的字符序列附加到指定的Writer对象并返回该Writer对象。
append(CharSequence csq)
// 将指定的字符附加到指定的Writer对象并返回该Writer对象。
append(char c)
// 刷新此输出流并强制写出所有缓冲的输出字符。
flush()
// 关闭输出流释放相关的系统资源。
close()OutputStreamWriter是字符流转换为字节流的桥梁,其子类FileWriter是基于该基础上的封装,可以直接将字符写入到文件。
// 字符流转换为字节流的桥梁
public class OutputStreamWriter extends Writer {
}
// 用于写入字符到文件
public class FileWriter extends OutputStreamWriter {
}FileWriter代码示例:
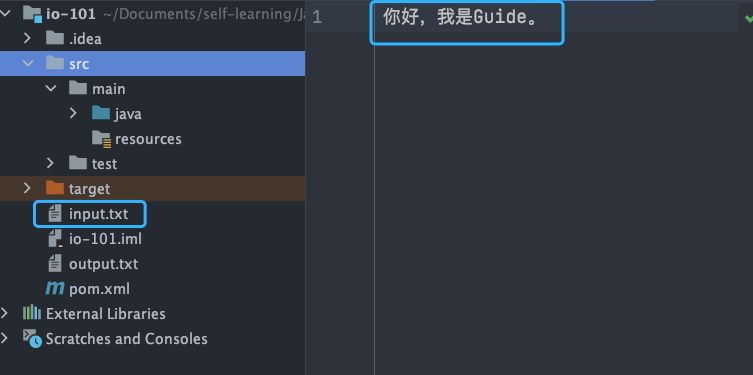
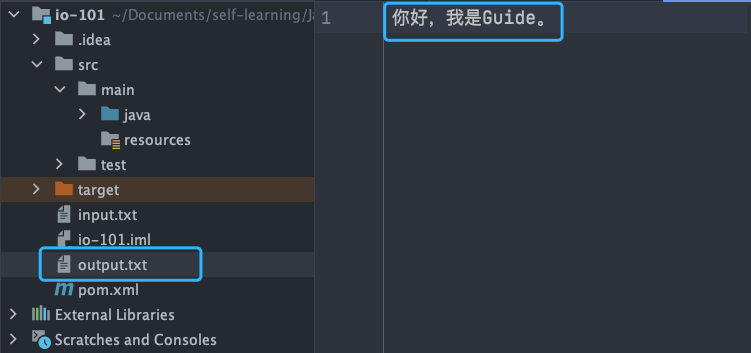
try (Writer output = new FileWriter("output.txt")) {
    output.write("你好,我是Guide。");
} catch (IOException e) {
    e.printStackTrace();
}
输出结果:
字节缓冲流
IO操作是很消耗性能的,缓冲流将数据加载至缓冲区,一次性读取/写入多个字节,从而避免频繁的IO操作,提高流的传输效率。字节缓冲流这里采用了装饰器模式来增强InputStream和OutputStream子类对象的功能。举个例子,我们可以通过BufferedInputStream(字节缓冲输入流)来增强FileInputStream的功能。
// 新建一个BufferedInputStream对象
BufferedInputStream bufferedInputStream = new BufferedInputStream(new FileInputStream("input.txt"));
字节流和字节缓冲流的性能差别主要体现在我们使用两者的时候都是调用write(int b)和read()这两个一次只读取一个字节的方法的时候。由于字节缓冲流内部有缓冲区(字节数组),因此,字节缓冲流会先将读取到的字节存放在缓存区,大幅减少IO次数,提高读取效率。
我使用write(int b)和read()方法,分别通过字节流和字节缓冲流复制一个524.9 mb的PDF文件耗时对比如下:
使用缓冲流复制PDF文件总耗时:15428毫秒
使用普通字节流复制PDF文件总耗时:2555062毫秒
两者耗时差别非常大,缓冲流耗费的时间是字节流的1/165。测试代码如下:
@Test
void copy_pdf_to_another_pdf_buffer_stream() {
    // 记录开始时间
    long start = System.currentTimeMillis();
    try (BufferedInputStream bis = new BufferedInputStream(new FileInputStream("深入理解计算机操作系统.pdf"));
         BufferedOutputStream bos = new BufferedOutputStream(new FileOutputStream("深入理解计算机操作系统-副本.pdf"))) {
        int content;
        while ((content = bis.read()) != -1) {
            bos.write(content);
        }
    } catch (IOException e) {
        e.printStackTrace();
    }
    // 记录结束时间
    long end = System.currentTimeMillis();
    System.out.println("使用缓冲流复制PDF文件总耗时:" + (end - start) + "毫秒");
}

@Test
void copy_pdf_to_another_pdf_stream() {
    // 记录开始时间
    long start = System.currentTimeMillis();
    try (FileInputStream fis = new FileInputStream("深入理解计算机操作系统.pdf");
         FileOutputStream fos = new FileOutputStream("深入理解计算机操作系统-副本.pdf")) {
        int content;
        while ((content = fis.read()) != -1) {
            fos.write(content);
        }
    } catch (IOException e) {
        e.printStackTrace();
    }
    // 记录结束时间
    long end = System.currentTimeMillis();
    System.out.println("使用普通流复制PDF文件总耗时:" + (end - start) + "毫秒");
}
如果是调用read(byte b[])和write(byte b[], int off, int len)这两个写入一个字节数组的方法的话,只要字节数组的大小合适,两者的性能差距其实不大,基本可以忽略。这次我们使用read(byte b[])和write(byte b[], int off, int len)方法,分别通过字节流和字节缓冲流复制一个524.9mb的PDF文件耗时对比如下:
使用缓冲流复制PDF文件总耗时:695毫秒
使用普通字节流复制PDF文件总耗时:989毫秒
两者耗时差别不是很大,缓冲流的性能要略微好一点点。测试代码如下:
@Test
void copy_pdf_to_another_pdf_with_byte_array_buffer_stream() {
    // 记录开始时间
    long start = System.currentTimeMillis();
    try (BufferedInputStream bis = new BufferedInputStream(new FileInputStream("深入理解计算机操作系统.pdf"));
         BufferedOutputStream bos = new BufferedOutputStream(new FileOutputStream("深入理解计算机操作系统-副本.pdf"))) {
        int len;
        byte[] bytes = new byte[4 * 1024];
        while ((len = bis.read(bytes)) != -1) {
            bos.write(bytes, 0, len);
        }
    } catch (IOException e) {
        e.printStackTrace();
    }
    // 记录结束时间
    long end = System.currentTimeMillis();
    System.out.println("使用缓冲流复制PDF文件总耗时:" + (end - start) + "毫秒");
}

@Test
void copy_pdf_to_another_pdf_with_byte_array_stream() {
    // 记录开始时间
    long start = System.currentTimeMillis();
    try (FileInputStream fis = new FileInputStream("深入理解计算机操作系统.pdf");
         FileOutputStream fos = new FileOutputStream("深入理解计算机操作系统-副本.pdf")) {
        int len;
        byte[] bytes = new byte[4 * 1024];
        while ((len = fis.read(bytes)) != -1) {
            fos.write(bytes, 0, len);
        }
    } catch (IOException e) {
        e.printStackTrace();
    }
    // 记录结束时间
    long end = System.currentTimeMillis();
    System.out.println("使用普通流复制PDF文件总耗时:" + (end - start) + "毫秒");
}
BufferedInputStream(字节缓冲输入流)
BufferedInputStream从源头(通常是文件)读取数据(字节信息)到内存的过程中不会一个字节一个字节的读取,而是会先将读取到的字节存放在缓存区,并从内部缓冲区中单独读取字节。这样大幅减少了IO次数,提高了读取效率。BufferedInputStream内部维护了一个缓冲区,这个缓冲区实际就是一个字节数组,通过阅读BufferedInputStream源码即可得到这个结论。
public class BufferedInputStream extends FilterInputStream {
    // 内部缓冲区数组
    protected volatile byte buf[];
    // 缓冲区的默认大小
    private static int DEFAULT_BUFFER_SIZE = 8192;
    // 使用默认的缓冲区大小
    public BufferedInputStream(InputStream in) {
        this(in, DEFAULT_BUFFER_SIZE);
    }
    // 自定义缓冲区大小
    public BufferedInputStream(InputStream in, int size) {
        super(in);
        if (size <= 0) {
            throw new IllegalArgumentException("Buffer size <= 0");
        }
        buf = new byte[size];
    }
}缓冲区的大小默认为8192字节,当然了,你也可以通过BufferedInputStream(InputStream in, int size)这个构造方法来指定缓冲区的大小。
BufferedOutputStream(字节缓冲输出流)
BufferedOutputStream将数据(字节信息)写入到目的地(通常是文件)的过程中不会一个字节一个字节的写入,而是会先将要写入的字节存放在缓存区,并从内部缓冲区中单独写入字节。这样大幅减少了IO次数,提高了读取效率
try (BufferedOutputStream bos = new BufferedOutputStream(new FileOutputStream("output.txt"))) {
    byte[] array = "JavaGuide".getBytes();
    bos.write(array);
} catch (IOException e) {
    e.printStackTrace();
}类似于BufferedInputStream,BufferedOutputStream内部也维护了一个缓冲区,并且,这个缓存区的大小也是8192字节。
字符缓冲流
BufferedReader(字符缓冲输入流)和BufferedWriter(字符缓冲输出流)类似于BufferedInputStream(字节缓冲输入流)和BufferedOutputStream(字节缓冲输入流),内部都维护了一个字节数组作为缓冲区。不过,前者主要是用来操作字符信息。
打印流
下面这段代码大家经常使用吧?
System.out.print("Hello!");
System.out.println("Hello!");
System.out实际是用于获取一个PrintStream对象,print方法实际调用的是PrintStream对象的write方法。PrintStream属于字节打印流,与之对应的是PrintWriter(字符打印流)。PrintStream是OutputStream的子类,PrintWriter是Writer的子类。
public class PrintStream extends FilterOutputStream
    implements Appendable, Closeable {
}
public class PrintWriter extends Writer {
}
随机访问流
这里要介绍的随机访问流指的是支持随意跳转到文件的任意位置进行读写的RandomAccessFile。
RandomAccessFile的构造方法如下,我们可以指定mode(读写模式)。
// openAndDelete参数默认为false表示打开文件并且这个文件不会被删除
public RandomAccessFile(File file, String mode)
    throws FileNotFoundException {
    this(file, mode, false);
}
// 私有方法
private RandomAccessFile(File file, String mode, boolean openAndDelete)  throws FileNotFoundException{
  // 省略大部分代码
}
读写模式主要有下面四种:
- r:只读模式。
- rw:读写模式
- rws:相对于rw,rws同步更新对“文件的内容”或“元数据”的修改到外部存储设备。
- rwd:相对于rw,rwd同步更新对“文件的内容”的修改到外部存储设备。
文件内容指的是文件中实际保存的数据,元数据则是用来描述文件属性比如文件的大小信息、创建和修改时间。RandomAccessFile中有一个文件指针用来表示下一个将要被写入或者读取的字节所处的位置。我们可以通过RandomAccessFile的seek(long pos)方法来设置文件指针的偏移量(距文件开头pos个字节处)。如果想要获取文件指针当前的位置的话,可以使用getFilePointer()方法。
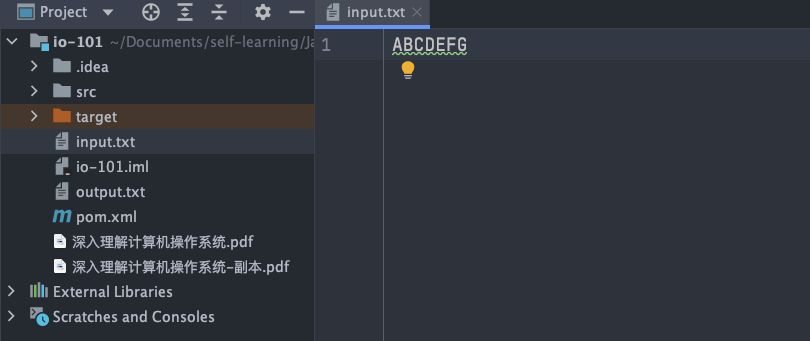
RandomAccessFile代码示例:
RandomAccessFile randomAccessFile = new RandomAccessFile(new File("input.txt"), "rw");
System.out.println("读取之前的偏移量:" + randomAccessFile.getFilePointer() + ",当前读取到的字符" + (char) randomAccessFile.read() + ",读取之后的偏移量:" + randomAccessFile.getFilePointer());
// 指针当前偏移量为6
randomAccessFile.seek(6);
System.out.println("读取之前的偏移量:" + randomAccessFile.getFilePointer() + ",当前读取到的字符" + (char) randomAccessFile.read() + ",读取之后的偏移量:" + randomAccessFile.getFilePointer());
// 从偏移量7的位置开始往后写入字节数据
randomAccessFile.write(new byte[]{'H', 'I', 'J', 'K'});
// 指针当前偏移量为0,回到起始位置
randomAccessFile.seek(0);
System.out.println("读取之前的偏移量:" + randomAccessFile.getFilePointer() + ",当前读取到的字符" + (char) randomAccessFile.read() + ",读取之后的偏移量:" + randomAccessFile.getFilePointer());
input.txt文件内容:
输出:
读取之前的偏移量:0,当前读取到的字符A,读取之后的偏移量:1
读取之前的偏移量:6,当前读取到的字符G,读取之后的偏移量:7
读取之前的偏移量:0,当前读取到的字符A,读取之后的偏移量:1
input.txt文件内容变为ABCDEFGHIJK。
RandomAccessFile的write方法在写入对象的时候如果对应的位置已经有数据的话,会将其覆盖掉。
RandomAccessFile randomAccessFile = new RandomAccessFile(new File("input.txt"), "rw");
randomAccessFile.write(new byte[]{'H', 'I', 'J', 'K'});
假设运行上面这段程序之前input.txt文件内容变为ABCD,运行之后则变为HIJK。
RandomAccessFile比较常见的一个应用就是实现大文件的断点续传。何谓断点续传?简单来说就是上传文件中途暂停或失败(比如遇到网络问题)之后,不需要重新上传,只需要上传那些未成功上传的文件分片即可。分片(先将文件切分成多个文件分片)上传是断点续传的基础。RandomAccessFile可以帮助我们合并文件分片,示例代码如下:

IO设计模式总结
装饰器模式
装饰器(Decorator)模式可以在不改变原有对象的情况下拓展其功能。
装饰器模式通过组合替代继承来扩展原始类的功能,在一些继承关系比较复杂的场景(IO这一场景各种类的继承关系就比较复杂)更加实用。对于字节流来说,FilterInputStream(对应输入流)和FilterOutputStream(对应输出流)是装饰器模式的核心,分别用于增强InputStream和OutputStream子类对象的功能。我们常见的BufferedInputStream(字节缓冲输入流)、DataInputStream等等都是FilterInputStream的子类,BufferedOutputStream(字节缓冲输出流)、DataOutputStream等等都是FilterOutputStream的子类。举个例子,我们可以通过BufferedInputStream(字节缓冲输入流)来增强FileInputStream的功能。
BufferedInputStream构造函数如下:
public BufferedInputStream(InputStream in) {
    this(in, DEFAULT_BUFFER_SIZE);
}

public BufferedInputStream(InputStream in, int size) {
    super(in);
    if (size <= 0) {
        throw new IllegalArgumentException("Buffer size <= 0");
    }
    buf = new byte[size];
}
可以看出,BufferedInputStream的构造函数其中的一个参数就是InputStream。
BufferedInputStream代码示例:
try (BufferedInputStream bis = new BufferedInputStream(new FileInputStream("input.txt"))) {
    int content;
    long skip = bis.skip(2);
    while ((content = bis.read()) != -1) {
        System.out.print((char) content);
    }
} catch (IOException e) {
    e.printStackTrace();
}这个时候,你可以会想了:为啥我们直接不弄一个BufferedFileInputStream(字符缓冲文件输入流)呢?
BufferedFileInputStream bfis = new BufferedFileInputStream("input.txt");如果InputStream的子类比较少的话,这样做是没问题的。不过,InputStream的子类实在太多,继承关系也太复杂了。如果我们为每一个子类都定制一个对应的缓冲输入流,那岂不是太麻烦了。如果你对IO流比较熟悉的话,你会发现ZipInputStream和ZipOutputStream还可以分别增强BufferedInputStream和BufferedOutputStream的能力。
BufferedInputStream bis = new BufferedInputStream(new FileInputStream(fileName));
ZipInputStream zis = new ZipInputStream(bis);

BufferedOutputStream bos = new BufferedOutputStream(new FileOutputStream(fileName));
ZipOutputStream zipOut = new ZipOutputStream(bos);
ZipInputStream和ZipOutputStream分别继承自InflaterInputStream和DeflaterOutputStream。
public
class InflaterInputStream extends FilterInputStream {
}

public
class DeflaterOutputStream extends FilterOutputStream {
}
这也是装饰器模式很重要的一个特征,那就是可以对原始类嵌套使用多个装饰器。为了实现这一效果,装饰器类需要跟原始类继承相同的抽象类或者实现相同的接口。上面介绍到的这些IO相关的装饰类和原始类共同的父类是InputStream和OutputStream。对于字符流来说,BufferedReader可以用来增加Reader(字符输入流)子类的功能,BufferedWriter可以用来增加Writer(字符输出流)子类的功能。
BufferedWriter bw = new BufferedWriter(new OutputStreamWriter(new FileOutputStream(fileName),"UTF-8"));IO流中的装饰器模式应用的例子实在是太多了,不需要特意记忆,完全没必要哈!搞清了装饰器模式的核心之后,你在使用的时候自然就会知道哪些地方运用到了装饰器模式。
适配器模式
适配器(Adapter Pattern)模式主要用于接口互不兼容的类的协调工作,你可以将其联想到我们日常经常使用的电源适配器。
适配器模式中存在被适配的对象或者类称为适配者(Adaptee),作用于适配者的对象或者类称为适配器(Adapter)。适配器分为对象适配器和类适配器。类适配器使用继承关系来实现,对象适配器使用组合关系来实现。
IO流中的字符流和字节流的接口不同,它们之间可以协调工作就是基于适配器模式来做的,更准确点来说是对象适配器。通过适配器,我们可以将字节流对象适配成一个字符流对象,这样我们可以直接通过字节流对象来读取或者写入字符数据。
InputStreamReader和OutputStreamWriter就是两个适配器(Adapter),同时,它们两个也是字节流和字符流之间的桥梁。InputStreamReader使用StreamDecoder(流解码器)对字节进行解码,实现字节流到字符流的转换,OutputStreamWriter使用StreamEncoder(流编码器)对字符进行编码,实现字符流到字节流的转换。
InputStream和OutputStream的子类是被适配者,InputStreamReader和OutputStreamWriter是适配器。
// InputStreamReader是适配器,FileInputStream是被适配的类
InputStreamReader isr = new InputStreamReader(new FileInputStream(fileName), "UTF-8");
// BufferedReader增强InputStreamReader的功能(装饰器模式)
BufferedReader bufferedReader = new BufferedReader(isr);
java.io.InputStreamReader部分源码:
public class InputStreamReader extends Reader {
	//用于解码的对象
	private final StreamDecoder sd;
    public InputStreamReader(InputStream in) {
        super(in);
        try {
            // 获取StreamDecoder对象
            sd = StreamDecoder.forInputStreamReader(in, this, (String)null);
        } catch (UnsupportedEncodingException e) {
            throw new Error(e);
        }
    }
    // 使用StreamDecoder对象做具体的读取工作
	public int read() throws IOException {
        return sd.read();
    }
}
java.io.OutputStreamWriter部分源码:
public class OutputStreamWriter extends Writer {
    // 用于编码的对象
    private final StreamEncoder se;
    public OutputStreamWriter(OutputStream out) {
        super(out);
        try {
           // 获取StreamEncoder对象
            se = StreamEncoder.forOutputStreamWriter(out, this, (String)null);
        } catch (UnsupportedEncodingException e) {
            throw new Error(e);
        }
    }
    // 使用StreamEncoder对象做具体的写入工作
    public void write(int c) throws IOException {
        se.write(c);
    }
}适配器模式和装饰器模式有什么区别呢?
装饰器模式更侧重于动态地增强原始类的功能,装饰器类需要跟原始类继承相同的抽象类或者实现相同的接口。并且,装饰器模式支持对原始类嵌套使用多个装饰器。
适配器模式更侧重于让接口不兼容而不能交互的类可以一起工作,当我们调用适配器对应的方法时,适配器内部会调用适配者类或者和适配类相关的类的方法,这个过程透明的。就比如说StreamDecoder(流解码器)和StreamEncoder(流编码器)就是分别基于InputStream和OutputStream来获取FileChannel对象并调用对应的read方法和write方法进行字节数据的读取和写入。
StreamDecoder(InputStream in, Object lock, CharsetDecoder dec) {
    // 省略大部分代码
    // 根据InputStream对象获取FileChannel对象
    ch = getChannel((FileInputStream)in);
}
适配器和适配者两者不需要继承相同的抽象类或者实现相同的接口。另外,FutureTask类使用了适配器模式,Executors的内部类RunnableAdapter实现属于适配器,用于将Runnable适配成Callable。FutureTask参数包含Runnable的一个构造方法:
public FutureTask(Runnable runnable, V result) {
    // 调用Executors类的callable方法
    this.callable = Executors.callable(runnable, result);
    this.state = NEW;
}
Executors中对应的方法和适配器:
// 实际调用的是Executors的内部类RunnableAdapter的构造方法
public static <T> Callable<T> callable(Runnable task, T result) {
    if (task == null)
        throw new NullPointerException();
    return new RunnableAdapter<T>(task, result);
}
// 适配器
static final class RunnableAdapter<T> implements Callable<T> {
    final Runnable task;
    final T result;
    RunnableAdapter(Runnable task, T result) {
        this.task = task;
        this.result = result;
    }
    public T call() {
        task.run();
        return result;
    }
}
工厂模式
工厂模式用于创建对象,NIO中大量用到了工厂模式,比如Files类的newInputStream方法用于创建InputStream对象(静态工厂)、Paths类的get方法创建Path对象(静态工厂)、ZipFileSystem类(sun.nio包下的类,属于java.nio相关的一些内部实现)的getPath的方法创建Path对象(简单工厂)。
InputStream is Files.newInputStream(Paths.get(generatorLogoPath))观察者模式
NIO中的文件目录监听服务使用到了观察者模式。NIO中的文件目录监听服务基于WatchService接口和Watchable接口。WatchService属于观察者,Watchable属于被观察者。Watchable接口定义了一个用于将对象注册到WatchService(监控服务)并绑定监听事件的方法register。
public interface Path
    extends Comparable<Path>, Iterable<Path>, Watchable{
}

public interface Watchable {
    WatchKey register(WatchService watcher,
                      WatchEvent.Kind<?>[] events,
                      WatchEvent.Modifier... modifiers)
        throws IOException;
}
WatchService用于监听文件目录的变化,同一个WatchService对象能够监听多个文件目录。
// 创建WatchService对象
WatchService watchService = FileSystems.getDefault().newWatchService();

// 初始化一个被监控文件夹的Path类:
Path path = Paths.get("workingDirectory");
// 将这个path对象注册到WatchService(监控服务)中去
WatchKey watchKey = path.register(
watchService, StandardWatchEventKinds...);
Path类register方法的第二个参数events(需要监听的事件)为可变长参数,也就是说我们可以同时监听多种事件。
WatchKey register(WatchService watcher,
                  WatchEvent.Kind<?>... events)
    throws IOException;
常用的监听事件有3种:
- StandardWatchEventKinds.ENTRY_CREATE:文件创建。
- StandardWatchEventKinds.ENTRY_DELETE:文件删除。
- StandardWatchEventKinds.ENTRY_MODIFY:文件修改。
register方法返回WatchKey对象,通过WatchKey对象可以获取事件的具体信息比如文件目录下是创建、删除还是修改了文件、创建、删除或者修改的文件的具体名称是什么。
WatchKey key;
while ((key = watchService.take()) != null) {
    for (WatchEvent<?> event : key.pollEvents()) {
      // 可以调用WatchEvent对象的方法做一些事情比如输出事件的具体上下文信息
    }
    key.reset();
}
WatchService内部是通过一个daemon thread(守护线程)采用定期轮询的方式来检测文件的变化,简化后的源码如下所示。
class PollingWatchService
    extends AbstractWatchService
{
    // 定义一个daemon thread(守护线程)轮询检测文件变化
    private final ScheduledExecutorService scheduledExecutor;

    PollingWatchService() {
        scheduledExecutor = Executors
            .newSingleThreadScheduledExecutor(new ThreadFactory() {
                 @Override
                 public Thread newThread(Runnable r) {
                     Thread t = new Thread(r);
                     t.setDaemon(true);
                     return t;
                 }});
    }

  void enable(Set<? extends WatchEvent.Kind<?>> events, long period) {
    synchronized (this) {
      // 更新监听事件
      this.events = events;

        // 开启定期轮询
      Runnable thunk = new Runnable() { public void run() { poll(); }};
      this.poller = scheduledExecutor
        .scheduleAtFixedRate(thunk, period, period, TimeUnit.SECONDS);
    }
  }
}IO模型详解
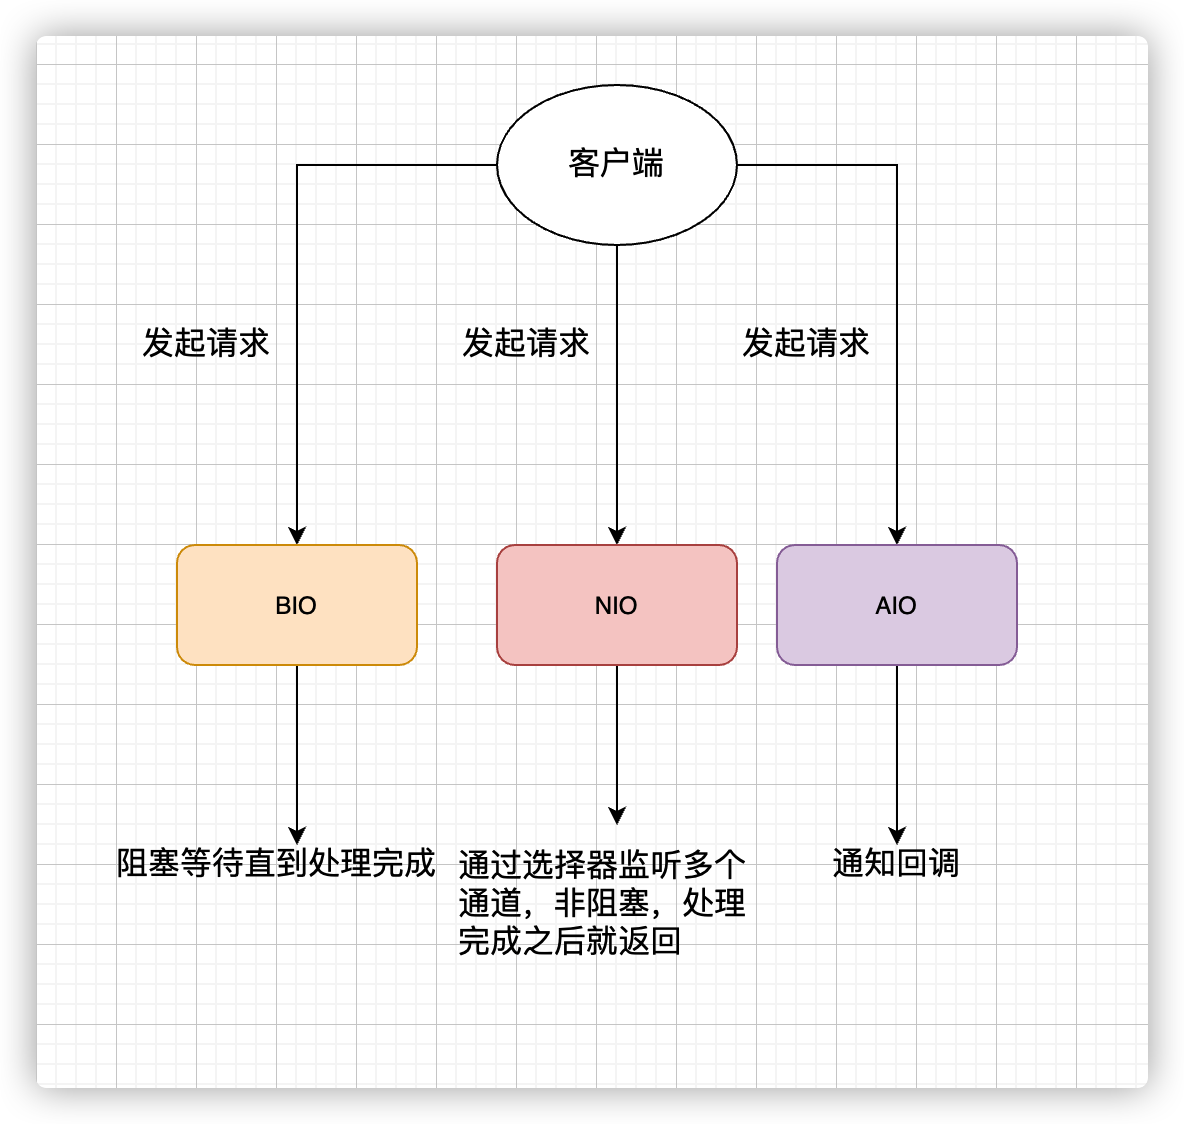
BIO(Blocking I/O)
BIO属于同步阻塞IO模型。
同步阻塞IO模型中,应用程序发起read调用后,会一直阻塞,直到内核把数据拷贝到用户空间。
在客户端连接数量不高的情况下,是没问题的。但是,当面对十万甚至百万级连接的时候,传统的BIO模型是无能为力的。因此,我们需要一种更高效的I/O处理模型来应对更高的并发量。
NIO(Non-blocking/New I/O)
Java中的NIO于Java1.4中引入,对应java.nio包,提供了Channel,Selector,Buffer等抽象。NIO中的N可以理解为Non-blocking,不单纯是New。它是支持面向缓冲的,基于通道的I/O操作方法。对于高负载、高并发的(网络)应用,应使用NIO。Java中的NIO可以看作是I/O多路复用模型。也有很多人认为,Java中的NIO属于同步非阻塞IO模型。
我们先来看看同步非阻塞IO模型。
同步非阻塞IO模型中,应用程序会一直发起read调用,等待数据从内核空间拷贝到用户空间的这段时间里,线程依然是阻塞的,直到在内核把数据拷贝到用户空间。相比于同步阻塞IO模型,同步非阻塞IO模型确实有了很大改进。通过轮询操作,避免了一直阻塞。但是,这种IO模型同样存在问题:应用程序不断进行I/O系统调用轮询数据是否已经准备好的过程是十分消耗CPU资源的。这个时候,I/O多路复用模型就上场了。
IO多路复用模型中,线程首先发起select调用,询问内核数据是否准备就绪,等内核把数据准备好了,用户线程再发起read调用。read调用的过程(数据从内核空间->用户空间)还是阻塞的。目前支持IO多路复用的系统调用,有select,epoll等等。select系统调用,目前几乎在所有的操作系统上都有支持。
- select调用:内核提供的系统调用,它支持一次查询多个系统调用的可用状态。几乎所有的操作系统都支持。
- epoll调用:linux2.6内核,属于select调用的增强版本,优化了IO的执行效率。
IO多路复用模型,通过减少无效的系统调用,减少了对CPU资源的消耗。
Java中的NIO,有一个非常重要的选择器(Selector)的概念,也可以被称为多路复用器。通过它,只需要一个线程便可以管理多个客户端连接。当客户端数据到了之后,才会为其服务。
AIO(Asynchronous I/O)
AIO也就是NIO2。Java7中引入了NIO的改进版NIO2,它是异步IO模型。
异步IO是基于事件和回调机制实现的,也就是应用操作之后会直接返回,不会堵塞在那里,当后台处理完成,操作系统会通知相应的线程进行后续的操作。
目前来说AIO的应用还不是很广泛。Netty之前也尝试使用过AIO,不过又放弃了。这是因为,Netty使用了AIO之后,在Linux系统上的性能并没有多少提升。最后,来一张图,简单总结一下Java中的BIO、NIO、AIO。
相关文章
NIO
NIO主要有三大核心部分:Channel(通道),Buffer(缓冲区),Selector(选择区)。
IO是面向流的,NIO是面向缓冲区的。传统IO基于字节流和字符流进行操作,而NIO基于Channel和Buffer进行操作,数据总是从通道读取到缓冲区中,或者从缓冲区写入到通道中。
Buffer
NIO中的关键Buffer实现有:ByteBuffer,CharBuffer,DoubleBuffer,FloatBuffer,IntBuffer,LongBuffer,ShortBuffer。分别对应基本数据类型:byte,char,double,float,int,long,short。NIO中还有MappedByteBuffer,HeapByteBuffer,DirectByteBuffer等缓冲区,本质上是一块可以写入数据,然后可以从中读取数据的内存。这块内存被包装成NIO Buffer对象,并提供了一组方法,用来方便的访问该块内存。这块内存被包装成NIO。
Buffer对象,并提供了一组方法,用来方便的访问该块内存,Buffer:顾名思义是一块缓冲区,实际上是一个容器,一个连续数组。Channel提供从文件、网络读取数据的渠道,但是读写的数据都必须经过Buffer。
向Buffer中写数据:从Channel到Buffer使用fileChannel.read(buf).或者通过Buffer的put()方法 buf.put()
从Buffer中读取数据:从Buffer到Channel使用channel.write(buf)) .或者使用get()方法 buf.get()
/**
* JAVA处理大文件,一般用BufferedReader,BufferedInputStream这类带缓冲的IO类,不过如果文件超大的话,更快的方式是采用MappedByteBuffer。MappedByteBuffer是NIO引入的文件内存映射方案,读写性能极高。NIO最主要的就是实现了对异步操作的支持。其中一种通过把一个套接字通道(SocketChannel)注册到一个选择器(Selector)中,不时调用后者的选择(select)方法就能返回满足的选择键(SelectionKey),键中包含了SOCKET事件信息。这就是select模型。
*
* FileChannel提供了map方法来把文件影射为内存映像文件:MappedByteBuffer map(int mode,long position,long size); 可以把文件的从position开始的size大小的区域映射为内存映像文件,mode指出了可访问该内存映像文件的方式:READ_ONLY(只读):试图修改得到的缓冲区将导致抛出 ReadOnlyBufferException.(MapMode.READ_ONLY);READ_WRITE(读/写):对得到的缓冲区的更改最终将传播到文件;该更改对映射到同一文件的其他程序不一定是可见的(MapMode.READ_WRITE);PRIVATE(专用):对得到的缓冲区的更改不会传播到文件,并且该更改对映射到同一文件的其他程序也不是可见的;相反,会创建缓冲区已修改部分的专用副本。 (MapMode.PRIVATE)

* MappedByteBuffer是ByteBuffer的子类,其扩充了三个方法:force():缓冲区是READ_WRITE模式下,此方法对缓冲区内容的修改强行写入文件;load():将缓冲区的内容载入内存,并返回该缓冲区的引用;isLoaded():如果缓冲区的内容在物理内存中,则返回真,否则返回假
*/
public void mappedByteBuffer(){
    File file = new File("D://data.txt");
    long len = file.length();
    byte[] ds = new byte[(int) len];
    try (RandomAccessFile randomAccessFile = new RandomAccessFile(file, "r");){
        MappedByteBuffer mappedByteBuffer = randomAccessFile.getChannel().map(FileChannel.MapMode.READ_ONLY, 0, len);
        for (int offset = 0; offset < len; offset++) {
            byte b = mappedByteBuffer.get();
            ds[offset] = b;
        }
        Scanner scan = new Scanner(new ByteArrayInputStream(ds)).useDelimiter(" ");
        while (scan.hasNext()) {
        	System.out.print(scan.next() + " ");
        }
    } catch (Exception e) {
       e.printStackTrace();
    }

/**
* map过程
* FileChannel提供了map方法把文件映射到虚拟内存,通常情况可以映射整个文件,如果文件比较大,可以进行分段映射。FileChannel中的几个变量:MapMode mode:内存映像文件访问的方式,共三种:MapMode.READ_ONLY:只读,试图修改得到的缓冲区将导致抛出异常。MapMode.READ_WRITE:读/写,对得到的缓冲区的更改最终将写入文件;但该更改对映射到同一文件的其他程序不一定是可见的。MapMode.PRIVATE:私用,可读可写,但是修改的内容不会写入文件,只是buffer自身的改变,这种能力称之为”copy on write”。
*
* position:文件映射时的起始位置。
* allocationGranularity:Memory allocation size for mapping buffers,通过native函数initIDs初始化。
*/
}
capacity(缓冲区数组的总长度 即可以容纳的最大数据量;在缓冲区创建时被设定并且不能改变)。capacity作为一个内存块,Buffer有一个固定的大小值,也叫“capacity”.你只能往里写capacity个byte、long,char等类型。一旦Buffer满了,需要将其清空(通过读数据或者清除数据)才能继续写数据往里写数据。
position(下一个要操作的数据元素的位置,下一个要被读或写的元素的索引,每次读写缓冲区数据时都会改变改值,为下次读写作准备),当你写数据到Buffer中时,position表示当前的位置。初始的position值为0.当一个byte、long等数据写到Buffer后,position会向前移动到下一个可插入数据的Buffer单元。position最大可为capacity – 1.当读取数据时,也是从某个特定位置读。当将Buffer从写模式切换到读模式,position会被重置为0. 当从Buffer的position处读取数据时,position向前移动到下一个可读的位置。
limit(缓冲区数组中不可操作的下一个元素的位置:limit<=capacity表示缓冲区的当前终点,不能对缓冲区超过极限的位置进行读写操作。且极限是可以修改的)。limit在写模式下,Buffer的limit表示你最多能往Buffer里写多少数据。 写模式下,limit等于Buffer的capacity。当切换Buffer到读模式时,limit表示你最多能读到多少数据。因此,当切换Buffer到读模式时,limit会被设置成写模式下的position值。换句话说,你能读到之前写入的所有数据(limit被设置成已写数据的数量,这个值在写模式下就是position)
mark(标记,调用mark()来设置mark=position,再调用reset()可以让position恢复到标记的位置)
mark <= position <= limit <= capacity。position和limit的含义取决于Buffer处在读模式还是写模式。不管Buffer处在什么模式,capacity的含义总是一样的。
Buffer常用方法
allocate(int capacity)//从堆空间中分配一个容量大小为capacity的byte数组作为缓冲区的byte数据存储器
allocateDirect(int capacity)//是不使用JVM堆栈而是通过操作系统来创建内存块用作缓冲区,它与当前操作系统能够更好的耦合,因此能进一步提高I/O操作速度。但是分配直接缓冲区的系统开销很大,因此只有在缓冲区较大并长期存在,或者需要经常重用时,才使用这种缓冲区
wrap(byte[] array)//这个缓冲区的数据会存放在byte数组中,bytes数组或buff缓冲区任何一方中数据的改动都会影响另一方。其实ByteBuffer底层本来就有一个bytes数组负责来保存buffer缓冲区中的数据,通过allocate方法系统会帮你构造一个byte数组
wrap(byte[] array, int offset, int length) //在上一个方法的基础上可以指定偏移量和长度,这个offset也就是包装后byteBuffer的position,而length呢就是limit-position的大小,从而我们可以得到limit的位置为length+position(offset)
limit(), limit(10)等//其中读取和设置这4个属性的方法的命名和jQuery中的val(),val(10)类似,一个负责get,一个负责set
reset()//把position设置成mark的值,相当于之前做过一个标记,现在要退回到之前标记的地方
clear()//position = 0;limit = capacity;mark = -1;有点初始化的味道,但是并不影响底层byte数组的内容
flip()//limit = position;position = 0;mark = -1;翻转,也就是让flip之后的position到limit这块区域变成之前的0到position这块,翻转就是将一个处于存数据状态的缓冲区变为一个处于准备取数据的状态 一般在从Buffer读出数据前调用。
rewind()//把position设为0,mark设为-1,不改变limit的值 一般在把数据重写入Buffer前调用 或者重新读取
remaining()//return limit - position;返回limit和position之间相对位置差
hasRemaining()//return position < limit返回是否还有未读内容
compact()//把从position到limit中的内容移到0到limit-position的区域内,position和limit的取值也分别变成limit-position、capacity。如果先将positon设置到limit,再compact,那么相当于clear()
get()//相对读,从position位置读取一个byte,并将position+1,为下次读写作准备
get(int index)//绝对读,读取byteBuffer底层的bytes中下标为index的byte,不改变position
get(byte[] dst, int offset, int length)//从position位置开始相对读,读length个byte,并写入dst下标从offset到offset+length的区域
put(byte b)//相对写,向position的位置写入一个byte,并将postion+1,为下次读写作准备
put(int index, byte b)//绝对写,向byteBuffer底层的bytes中下标为index的位置插入byte b,不改变position
put(ByteBuffer src)//用相对写,把src中可读的部分(也就是position到limit)写入此byteBuffer
put(byte[] src, int offset, int length)//从src数组中的offset到offset+length区域读取数据并使用相对写写入此byteBuffer
ByteOrder order()//检索此缓冲区的字节顺序。
ByteBuffer order(ByteOrder bo)//修改缓冲区的字节顺序。
ByteBuffer putInt(int value)//编写int值的相对put方法(可选操作) 。以当前字节顺序将包含给定int值的四个字节写入当前位置的缓冲区,然后将位置递增四。
byte[] array()//返回支持此缓冲区的字节数组(可选操作) 。对此缓冲区内容的修改将导致返回的数组的内容被修改,反之亦然。在调用此方法之前调用hasArray方法,以确保此缓冲区具有可访问的后台阵列。
Buffer.mark()
//通过调用Buffer.mark()方法,可以标记Buffer中的一个特定position。之后可以通过调用Buffer.reset()方法恢复到这个position
//可以使用equals()和compareTo()方法两个Buffer。
equals()
//当满足下列条件时,表示两个Buffer相等:有相同的类型(byte、char、int等)。Buffer中剩余的byte、char等的个数相等。Buffer中所有剩余的byte、char等都相同。如你所见,equals只是比较Buffer的一部分,不是每一个在它里面的元素都比较。实际上,它只比较Buffer中的剩余元素。
compareTo()方法
//compareTo()方法比较两个Buffer的剩余元素(byte、char等), 如果满足下列条件,则认为一个Buffer“小于”另一个Buffer:第一个不相等的元素小于另一个Buffer中对应的元素 。所有元素都相等,但第一个Buffer比另一个先耗尽(第一个Buffer的元素个数比另一个少)。
Channel
NIO中的Channel的主要实现有:FileChannel(从文件中读写数据) 、DatagramChannel(通过UDP读写网络中的数据)、SocketChannel(通过TCP读写网络中的数据)、ServerSocketChannel(可以监听新进来的TCP连接,像Web服务器那样。对每一个新进来的连接都会创建一个SocketChannel)
/**
* NIO读取文件 RandomAccessFile进行操作,也可以通FileInputStream.getChannel()获取channel进行操作
*/
public void newIORead() {
    RandomAccessFile aFile = null;
    try {
        aFile = new RandomAccessFile("src/nio.txt", "rw");
        FileChannel fileChannel = aFile.getChannel();
        // buffer分配空间 根据Buffer实现类表明分配时的单位 下面代表分配1024个字节 CharBuffer就代表1024个字符
        ByteBuffer buf = ByteBuffer.allocate(1024);
        // 通道必须结合Buffer使用,不能直接向通道中读/写数据,
        // read()表示读channel数据写入到buffer,write()表示读取buffer数据写入到channel。
        int bytesRead = fileChannel.read(buf);
        while (bytesRead != -1) {
            // 在读模式下,可以读取之前写入到buffer的所有数据,调用flip()方法,position设回0,并将limit设成之前的position的值
            // 数据就是从position到limit的数据
            // capacity(缓冲区数组的总长度),position(下一个要操作的数据元素的位置),limit(缓冲区数组中不可操作的下一个元素的位置:limit<=capacity),mark(用于记录当前position的前一个位置或者默认是-1)
            buf.flip();
            // hasRemaining()用于判断当前位置(position)和限制(limit)之间是否有任何元素
            while (buf.hasRemaining()) {
                System.out.print((char) buf.get());
            }
            // clear()方法:position将被设回0,limit设置成capacity,换句话说,Buffer被清空了,
            // 其实Buffer中的数据并未被清除,只是这些标记告诉我们可以从哪里开始往Buffer里写数据。
            // 如果Buffer中有一些未读的数据,调用clear()方法,数据将“被遗忘”,意味着不再有任何标记会告诉你哪些数据被读过,哪些还没有。
            // 如果Buffer中仍有未读的数据,且后续还需要这些数据,但是此时想要先写些数据,那么使用compact()方法。
            // compact()方法将所有未读的数据拷贝到Buffer起始处。然后将position设到最后一个未读元素正后面。limit属性依然像clear()方法一样,设置成capacity。
            // 现在Buffer准备好写数据了,但是不会覆盖未读的数据。
            buf.compact();
            bytesRead = fileChannel.read(buf);
        }
    } catch (Exception e) {
        e.printStackTrace();
    } finally {
        try {
            if (aFile != null) {
                aFile.close();
            }
        } catch (Exception e) {
            e.printStackTrace();
        }
    }
}

/**
 * NIO写数据 通过FileChannel写入数据
 */
public void FileChannelOnWrite() {
    try {
        RandomAccessFile accessFile = new RandomAccessFile("D://file1.txt", "rw");
        FileChannel fc = accessFile.getChannel();
        byte[] bytes = new String("write to file1.txt").getBytes();
        // 获得ByteBuffer的实例 类似allocate(int capacity)方法
        ByteBuffer byteBuffer = ByteBuffer.wrap(bytes);
        // 读取缓冲区数据写入到通道。
        fc.write(byteBuffer);
        // 清空缓存区 使得缓存区可以继续写入数据
        byteBuffer.clear();
        // 缓存区写入内容
        byteBuffer.put(new String(",a good boy").getBytes());
        // 写模式转化读模式
        byteBuffer.flip();
        // 读取缓冲区数据写入到通道。
        fc.write(byteBuffer);
        fc.close();
        accessFile.close();
    } catch (Exception e) {
        e.printStackTrace();
    }
}

/**
 * FileChannel的transferFrom()方法可以将数据从源通道传输到FileChannel中
 * (译者注:这个方法在JDK文档中的解释为将字节从给定的可读取字节通道传输到此通道的文件中)。
 */
public void testTransferFrom() {
    try {
        RandomAccessFile fromFile = new RandomAccessFile("D://file1.txt", "rw");
        FileChannel fromChannel = fromFile.getChannel();
        RandomAccessFile toFile = new RandomAccessFile("D://file2.txt", "rw");
        FileChannel toChannel = toFile.getChannel();

        long position = 0;
        long count = fromChannel.size();
        toChannel.transferFrom(fromChannel, position, count);

        fromFile.close();
        toFile.close();
    } catch (Exception e) {
        e.printStackTrace();
    }
}

/**
 * transferTo()方法将数据从FileChannel传输到其他的channel中
 */
public static void testTransferTo() {
    try {
        RandomAccessFile fromFile = new RandomAccessFile("D://file1.txt", "rw");
        FileChannel fromChannel = fromFile.getChannel();
        RandomAccessFile toFile = new RandomAccessFile("D://file3.txt", "rw");
        FileChannel toChannel = toFile.getChannel();

        long position = 0;
        long count = fromChannel.size();
        fromChannel.transferTo(position, count, toChannel);
        fromFile.close();
        toFile.close();
    } catch (Exception e) {
        e.printStackTrace();
    }
}

//-----------------------nio socket-------------------------------------

/**
 * NIO新建socket client
 */
public void newIOSocketClient() {
    ByteBuffer buffer = ByteBuffer.allocate(1024);
    SocketChannel socketChannel = null;
    try {
        // 通过 ServerSocketChannel.open()方法来创建一个新的ServerSocketChannel对象,
        // 该对象关联了一个未绑定ServerSocket的通道.通过调用该对象上的socket()方法可以获取与之关联的ServerSocket。
        socketChannel = SocketChannel.open();
        socketChannel.configureBlocking(false);
        socketChannel.connect(new InetSocketAddress("10.10.195.115", 8080));
        // 为了确定连接是否建立,可以调用finishConnect()的方法。
        if (socketChannel.finishConnect()) {
            int i = 0;
            while (true) {
                TimeUnit.SECONDS.sleep(1);
                String info = "I'm " + i++ + "-th information from client";
                buffer.clear();
                buffer.put(info.getBytes());
                buffer.flip();
                while (buffer.hasRemaining()) {
                    System.out.println(buffer);
                    socketChannel.write(buffer);
                }
            }
        }
    } catch (Exception e) {
        e.printStackTrace();
    } finally {
        try {
            if (socketChannel != null) {
                socketChannel.close();
            }
        } catch (Exception e) {
            e.printStackTrace();
        }
    }
}

/**
 * NIO socket server
 *
 * @throws Exception
 */
public void NIOSocketServer() throws Exception {
    ServerSocketChannel socketChannel = ServerSocketChannel.open();
    // 非阻塞模式
    socketChannel.configureBlocking(false);
    // socketChannel.socket().bind(new InetSocketAddress(9999));jdk 1.7之前
    socketChannel.bind(new InetSocketAddress(9999));
    ByteBuffer byteBuffer = ByteBuffer.allocate(1024);
    while (true) {
        // 通过 ServerSocketChannel.accept() 方法监听新进来的连接。
        // 在阻塞模式下当 accept()方法返回的时候,它返回一个包含新进来的连接的SocketChannel,否则accept()方法会一直阻塞到有新连接到达。
        // 在非阻塞模式下,在没有新连接的情况下,accept()会立即返回null,该模式下通常不会仅仅只监听一个连接,因此需在while循环中调用
        // accept()方法.
        SocketChannel channel = socketChannel.accept();
        if (channel != null) {
            InetSocketAddress remoteAddress = (InetSocketAddress) channel.getRemoteAddress();
            System.out.println(remoteAddress.getAddress());
            System.out.println(remoteAddress.getPort());
            channel.read(byteBuffer);
            byteBuffer.flip();
            while (byteBuffer.hasRemaining()) {
                System.out.print((char) byteBuffer.get());
            }
        }
    }
}

/**
 * UDP发送方
 *
 * @throws Exception
 */
public void DatagramChannelsend() throws Exception {
    // 通过DatagramChannel的open()方法来创建。需要注意DatagramChannel的open()方法只是打开获得通道,
    // 但此时尚未连接。尽管DatagramChannel无需建立连接(远端连接),但仍然可以通过isConnect()检测当前的channel是否声明了远端连接地址。
    DatagramChannel channel = DatagramChannel.open();
    ByteBuffer byteBuffer = ByteBuffer.wrap(new String("i 'm client").getBytes());
    // 通过send()方法将ByteBuffer中的内容发送到指定的SocketAddress对象所描述的地址。在阻塞模式下,调用线程会被阻塞至有数据包被加入传输队列。
    // 非阻塞模式下,如果发送内容为空则返回0,否则返回发送的字节数。发送数据报是一个全有或全无(all-or-nothing)的行为。
    // 如果传输队列没有足够空间来承载整个数据报,那么什么内容都不会被发送。
    // 请注意send()方法返回的非零值并不表示数据报到达了目的地,仅代表数据报被成功加到本地网络层的传输队列。
    // 此外,传输过程中的协议可能将数据报分解成碎片,被分解的数据报在目的地会被重新组合起来,接收者将看不到碎片。
    // 但是,如果有一个碎片不能按时到达,那么整个数据报将被丢弃。分解有助于发送大数据报,但也会会造成较高的丢包率。
    int bytesSent = channel.send(byteBuffer, new InetSocketAddress("127.0.0.1", 9999));
    System.out.println("bytesSent="+bytesSent);
}

/**
 * UDP接收方
 */
public void receiveData() throws IOException {
    DatagramChannel channel = DatagramChannel.open();
    channel.socket().bind(new InetSocketAddress(9999));
    ByteBuffer byteBuffer = ByteBuffer.allocate(1024);
    byteBuffer.clear();
    // 通过receive()方法接受DatagramChannel中数据。从该方法将传入的数据报的数据将被复制到ByteBuffer中,
    // 同时返回一个SocketAddress对象以指出数据来源。在阻塞模式下,receive()将会阻塞至有数据包到来,
    // 非阻塞模式下,如果没有可接受的包则返回null。如果包内的数据大小超过缓冲区容量时,多出的数据会被悄悄抛弃
    SocketAddress address = channel.receive(byteBuffer);// receive data
    System.out.println(address);
    byteBuffer.flip();
    while (byteBuffer.hasRemaining()) {
        System.out.print((char) byteBuffer.get());
    }
}
**Channel常用方法 **
int read(ByteBuffer dst) //从Channel到中读取数据到ByteBuffer
long read(ByteBuffer[] dsts) //将Channel到中的数据“分散”到ByteBuffer[]
int write(ByteBuffer src) //将ByteBuffer到中的数据写入到Channel
long write(ByteBuffer[] srcs) //将ByteBuffer[]到中的数据“聚集”到Channel
long position() //返回此通道的文件位置
FileChannel position(long p) //设置此通道的文件位置
long size() //返回此通道的文件的当前大小
FileChannel truncate(long s) //将此通道的文件截取为给定大小
void force(boolean metaData) //强制将所有对此通道的文件更新写入到存储设备中
Selector
Selector(选择区)用于监听多个通道的事件(比如:连接打开,数据到达)因此,单个线程可以监听多个数据通道。
Selector的创建
Selector selector = Selector.open();为了将Channel和Selector配合使用,必须将Channel注册到Selector上,通过SelectableChannel.register()方法来实现,沿用nio创建socket
ServerSocketChannel channel = ServerSocketChannel.open();
channel.socket().bind(new InetSocketAddress(PORT));
channel.configureBlocking(false);
SelectionKey key = channel.register(selector, SelectionKey.OP_ACCEPT);
与Selector一起使用时,Channel必须处于非阻塞模式下。这意味着不能将FileChannel与Selector一起使用,因为FileChannel不能切换到非阻塞模式。而套接字通道都可以。
注意register()方法的第二个参数。这是一个“interest集合”,意思是在通过Selector监听Channel时对什么事件感兴趣。可以监听四种不同类型的事件:
- Connect连接
- Accept接收
- Read读
- Write写
这四种事件用SelectionKey的四个常量来表示:1.SelectionKey.OP_CONNECT 2. SelectionKey.OP_ACCEPT 3. SelectionKey.OP_READ 4.SelectionKey.OP_WRITE
SelectionKey
一个SelectionKey键表示了一个特定的通道对象和一个特定的选择器对象之间的注册关系。
当向Selector注册Channel时,register()方法会返回一个SelectionKey对象。这个对象包含了一些你感兴趣的属性
interest集合:就像向Selector注册通道一节中所描述的,interest集合是你所选择的感兴趣的事件集合。可以通过SelectionKey读写interest集合。
ready集合:通道已经准备就绪的操作的集合。在一次选择(Selection)之后,你会首先访问这个ready set。可以这样访问ready集合: int readySet = selectionKey.readyOps();
可以用像检测interest集合那样的方法,来检测channel中什么事件或操作已经就绪。但是,也可以使用以下四个方法,它们都会返回一个布尔类型:
selectionKey.isAcceptable();
selectionKey.isConnectable();
selectionKey.isReadable();
selectionKey.isWritable();
从SelectionKey访问Channel和Selector很简单:
Channel channel = selectionKey.channel();
Selector selector = selectionKey.selector();
可以将一个对象或者更多信息附着到SelectionKey上,这样就能方便的识别某个给定的通道。例如,可以附加与通道一起使用的Buffer,或是包含聚集数据的某个对象。使用方法:
selectionKey.attach(theObject);
Object attachedObj = selectionKey.attachment();
还可以在用register()方法向Selector注册Channel的时候附加对象。如:
SelectionKey key = channel.register(selector, SelectionKey.OP_READ, theObject);SelectionKey常用方法
key.attachment(); //返回SelectionKey的attachment,attachment可以在注册channel的时候指定。
key.channel(); //返回该SelectionKey对应的channel。
key.selector(); //返回该SelectionKey对应的Selector。
key.interestOps(); //返回代表需要Selector监控的IO操作的bit mask
key.readyOps(); //返回一个bit mask,代表在相应channel上可以进行的IO操作。
通过Selector选择通道一旦向Selector注册了一或多个通道,就可以调用几个重载的select()方法。这些方法返回你所感兴趣的事件(如连接、接受、读或写)已经准备就绪的那些通道。
select()方法
int select() //阻塞到至少有一个通道在你注册的事件上就绪了
int select(long timeout) //和select()一样,除了最长会阻塞timeout毫秒(参数)。
int selectNow() //不会阻塞,不管什么通道就绪都立刻返回(译者注:此方法执行非阻塞的选择操作。如果自从前一次选择操作后,没有通道变成可选择的,则此方法直接返回零。
//select()方法返回的int值表示有多少通道已经就绪。亦即自上次调用select()方法后有多少通道变成就绪状态。如果调用select()方法,有一个通道变成就绪状态,返回了1,若再次调用select()方法,如果另一个通道就绪了,它会再次返回1。如果对第一个就绪的channel没有做任何操作,现在就有两个就绪的通道,但在每次select()方法调用之间,只有一个通道就绪了。一旦调用了select()方法,并且返回值表明有一个或更多个通道就绪了,然后可以通过调用selector的selectedKeys()方法,Set selectedKeys = selector.selectedKeys();当向Selector注册Channel时,Channel.register()方法会返回一个SelectionKey对象。这个对象代表了注册到该Selector的通道。注意每次迭代末尾的keyIterator.remove()调用。Selector不会自己从已选择键集中移除SelectionKey实例。必须在处理完通道时自己移除。下次该通道变成就绪时,Selector会再次将其放入已选择键集中。
SelectionKey.channel()//方法返回的通道需要转型成你要处理的类型,如ServerSocketChannel或SocketChannel等。。
static class ServerSelector {
    private static final int BUF_SIZE = 1024;
    private static final int PORT = 8080;
    private static final int TIMEOUT = 3000;

    // public static void main(String[] args){
    //     selector();
    // }

    /**
     * 接收就绪处理
     * @param key
     * @throws Exception
     */
    public void handleAccept(SelectionKey key) throws Exception {
        ServerSocketChannel serverSocketChannel = (ServerSocketChannel) key.channel();
        SocketChannel socketChannel = serverSocketChannel.accept();
        socketChannel.configureBlocking(false);
        socketChannel.register(key.selector(), SelectionKey.OP_READ, ByteBuffer.allocateDirect(BUF_SIZE));
    }

    /**
     * 读就绪处理
     * @param key
     * @throws Exception
     */
    public void handleRead(SelectionKey key) throws Exception {
        SocketChannel socketChannel = (SocketChannel) key.channel();
        ByteBuffer buf = (ByteBuffer) key.attachment();
        long bytesRead = socketChannel.read(buf);
        while (bytesRead > 0) {
            buf.flip();
            while (buf.hasRemaining()) {
                System.out.print((char) buf.get());
            }
            System.out.println();
            buf.clear();
            bytesRead = socketChannel.read(buf);
        }
        if (bytesRead == -1) {
            socketChannel.close();
        }
    }

    /**
     * 写就绪处理
     * @param key
     * @throws Exception
     */
    public void handleWrite(SelectionKey key) throws Exception {
        ByteBuffer buf = (ByteBuffer) key.attachment();
        buf.flip();
        SocketChannel socketChannel = (SocketChannel) key.channel();
        while (buf.hasRemaining()) {
            socketChannel.write(buf);
        }
        buf.compact();
    }

    /**
     * 注册选择器
     */
    public void selector() {
        Selector selector = null;
        ServerSocketChannel serverSocketChannel = null;
        try {
            // 打开选择器
            selector = Selector.open();
            // 打开ServerSocketChannel通道
            serverSocketChannel = ServerSocketChannel.open();
            serverSocketChannel.socket().bind(new InetSocketAddress(PORT));
            // 设置非阻塞模式
            serverSocketChannel.configureBlocking(false);
            // 注册 监听接收
            serverSocketChannel.register(selector, SelectionKey.OP_ACCEPT);
            while (true) {
                if (selector.select(TIMEOUT) == 0) {
                    System.out.println("未检测到有通道就绪");
                    continue;
                }
                Iterator<SelectionKey> iter = selector.selectedKeys().iterator();
                while (iter.hasNext()) {
                    SelectionKey key = iter.next();
                    if (key.isAcceptable()) {
                        // 接收就绪
                        handleAccept(key);
                    }
                    if (key.isReadable()) {
                        // 读就绪
                        handleRead(key);
                    }
                    if (key.isWritable() && key.isValid()) {
                        // 写就绪
                        handleWrite(key);
                    }
                    if (key.isConnectable()) {
                        // 连接就绪
                        System.out.println("isConnectable = true");
                    }
                    iter.remove();
                }
            }
        } catch (Exception e) {
            e.printStackTrace();
        } finally {
            try {
                if (selector != null) {
                    selector.close();
                }
                if (serverSocketChannel != null) {
                    serverSocketChannel.close();
                }
            } catch (Exception e) {
                e.printStackTrace();
            }
        }
    }
}

static class ClientSelector {

    /*标识数字*/
    private static int flag = 0;
    /*缓冲区大小*/
    private static int BLOCK = 4096;
    /*接受数据缓冲区*/
    private static ByteBuffer sendbuffer = ByteBuffer.allocate(BLOCK);
    /*发送数据缓冲区*/
    private static ByteBuffer receivebuffer = ByteBuffer.allocate(BLOCK);
    /*服务器端地址*/
    private final static InetSocketAddress SERVER_ADDRESS = new InetSocketAddress(
            "localhost", 8888);

    // public static void main(String[] args) {
    //     selector();
    // }
    public void selector() throws Exception{
        // 打开socket通道
        SocketChannel socketChannel = SocketChannel.open();
        // 设置为非阻塞方式
        socketChannel.configureBlocking(false);
        // 打开选择器
        Selector selector = Selector.open();
        // 注册连接服务端socket动作
        socketChannel.register(selector, SelectionKey.OP_CONNECT);
        // 连接
        socketChannel.connect(SERVER_ADDRESS);

        int count = 0;
        while (true) {
            //选择一组键,其相应的通道已为 I/O 操作准备就绪。
            //此方法执行处于阻塞模式的选择操作。
            int selctorCount = selector.select();
            if(selctorCount <= 0) continue;
            //返回此选择器的已选择键集。
            Set<SelectionKey> selectionKeys = selector.selectedKeys();
            //System.out.println(selectionKeys.size());
            Iterator<SelectionKey> iterator = selectionKeys.iterator();
            while (iterator.hasNext()) {
                SelectionKey selectionKey = iterator.next();
                if (selectionKey.isConnectable()) {
                    System.out.println("client connect");
                    SocketChannel client = (SocketChannel) selectionKey.channel();
                    // 判断此通道上是否正在进行连接操作。
                    // 完成套接字通道的连接过程。
                    if (client.isConnectionPending()) {
                        client.finishConnect();
                        System.out.println("完成连接!");
                        sendbuffer.clear();
                        sendbuffer.put("Hello,Server".getBytes());
                        sendbuffer.flip();
                        client.write(sendbuffer);
                    }
                    client.register(selector, SelectionKey.OP_READ);
                } else if (selectionKey.isReadable()) {
                    SocketChannel client = (SocketChannel) selectionKey.channel();
                    //将缓冲区清空以备下次读取
                    receivebuffer.clear();
                    //读取服务器发送来的数据到缓冲区中
                    count = client.read(receivebuffer);
                    if(count > 0){
                        String receiveText = new String( receivebuffer.array(),0,count);
                        System.out.println("客户端接受服务器端数据--:"+receiveText);
                        client.register(selector, SelectionKey.OP_WRITE);
                    }

                } else if (selectionKey.isWritable()) {
                    sendbuffer.clear();
                    SocketChannel client = (SocketChannel) selectionKey.channel();
                    String sendText = "message from client--" + (flag++);
                    sendbuffer.put(sendText.getBytes());
                    //将缓冲区各标志复位,因为向里面put了数据标志被改变要想从中读取数据发向服务器,就要复位
                    sendbuffer.flip();
                    client.write(sendbuffer);
                    System.out.println("客户端向服务器端发送数据--:"+sendText);
                    client.register(selector, SelectionKey.OP_READ);
                }
            }
            selectionKeys.clear();
        }
    }
}
Netty
| Netty demo | 让Netty“榨干”你的CPU | Netty简易实战,傻瓜都能看懂! |
|---|---|---|
| Java NIO?看这一篇就够了! | NIO系列教程 | Netty底层的IO模型是什么? |